Introduction:
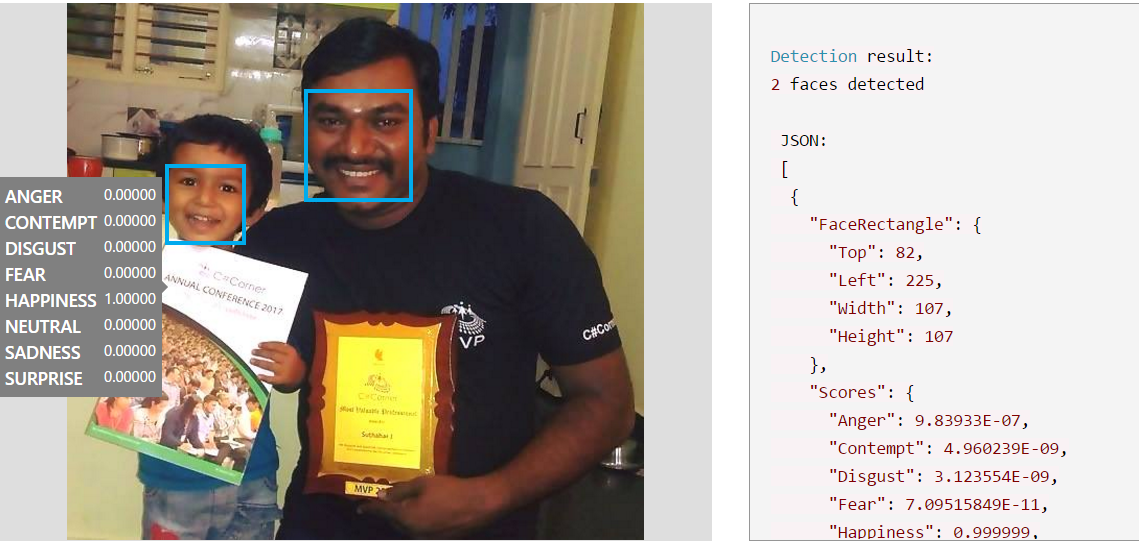
Microsoft Cognitive Services awesome APIs and services for developers to create more intelligent applications. You can add more interesting feature like people emotion and video detection, facial, speech and vision recognition and speech and language understanding into our all the application. The following sample image showing for emotion and face detection using cognitive service.
In this article, you will get understand how to Create a Cognitive Services APIs account in the Azure Portal.
Prerequisites:

Create a Cognitive Services Account in Azure:
You can follow below steps for Create a Cognitive Services APIs account in the Azure Portal.
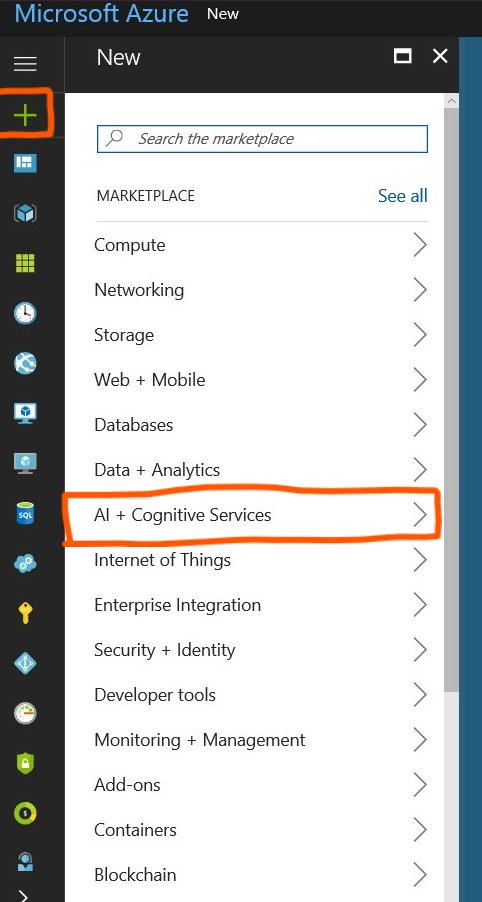
Step 2: Click + NEW and Select AI + Cognitive Services
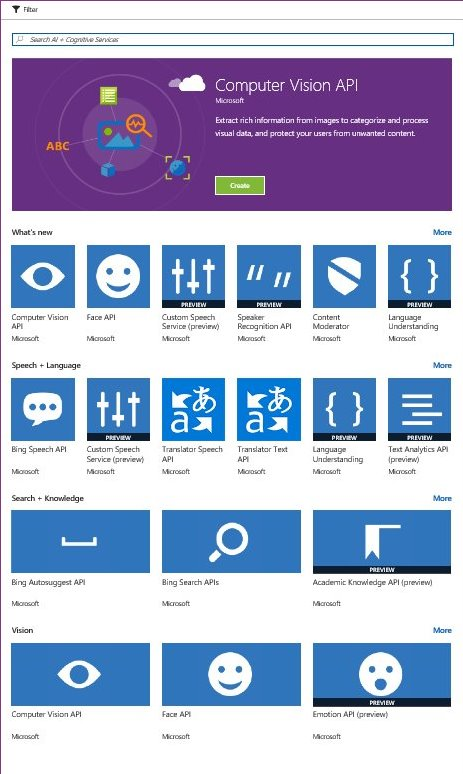
Step 3: You can see the entire list of Cognitive Services APIs. Click on the API of your choice to proceed.
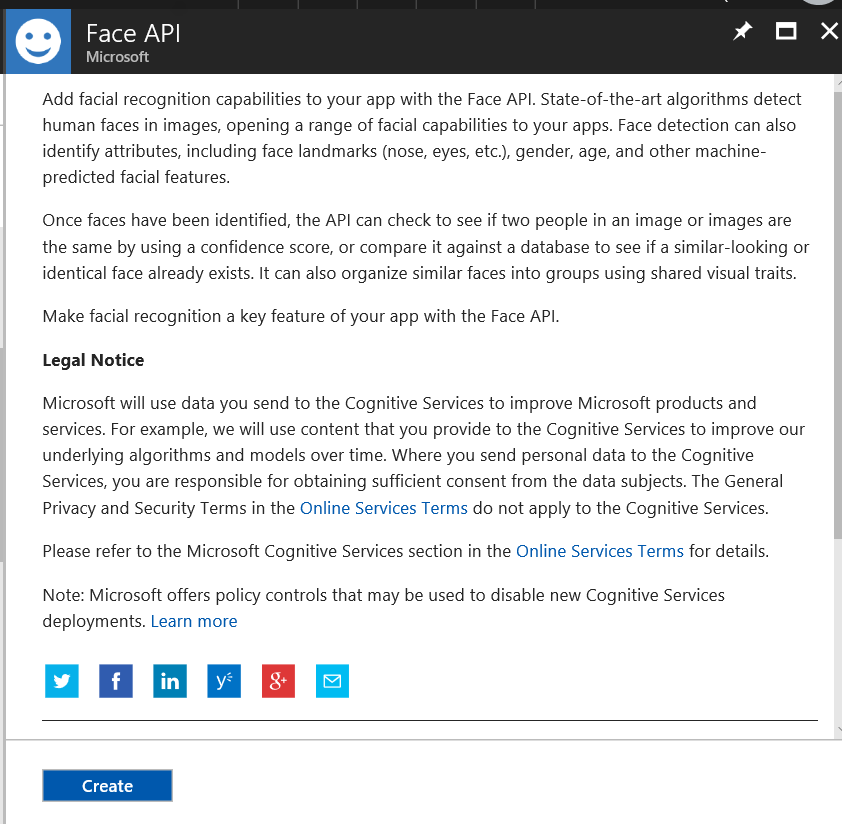
Step 4: Select on required API and read about the API and Click on Create
Step 5: after click on create button, provide the following information for create cognitive service and click on create.
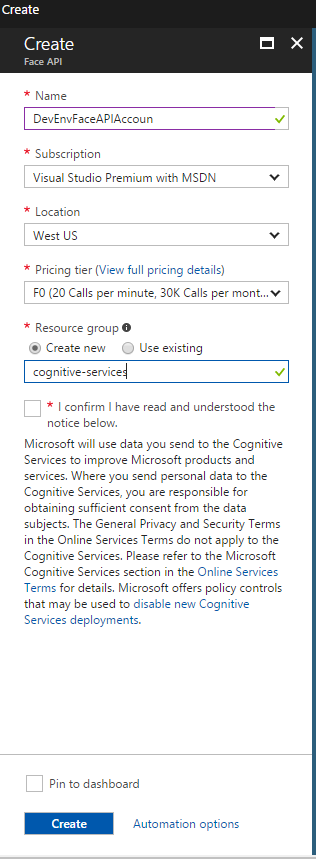
Name: Name of the account, Microsoft recommend a descriptive name. for example, <common name><APIName>Account.
Subscription: Select the available Azure subscriptions.
Location: Select the service locations.
Pricing tier: you can choose your pricing tier. F0 is free service and S0 paid service. based on your usage you can choose the pricing tier

Select the Resource group > confirm the Microsoft notice and Click on create for create the account
Step 6: wait for few second and you will get notification after complete. If Cognitive Services account is successfully deployed, click the notification to view the account information.
You can see and copy the Endpoint URL in the Overview section.

You can also copy keys in the Keys section to start making API calls in our Xamarin or other applications.

Summary:
In this article, you learned about how to Create a Cognitive Services APIs account in the Azure Portal.
We can use these keys and end point URL to the next article with app to communicate intelligent feature in Xamarin application.
If you have any questions/ feedback/ issues, please write in the comment box.
Thank you for posting the valuable information.
ReplyDeleteMicrosoft Azure Online Training
thanks for sharing. You have covered topic on azure certification
ReplyDeleteNice .,
ReplyDeleteMicrosoft Windows Azure Training | Online Course | Certification in chennai | Microsoft Windows Azure Training | Online Course | Certification in bangalore | Microsoft Windows Azure Training | Online Course | Certification in hyderabad | Microsoft Windows Azure Training | Online Course | Certification in pune
Virtual events are naturally more inclusive than in-person events in many respects but there are still a lot of things that planners can do to make them more accessible to people with disabilities. event marketing and planning a vendor fair
ReplyDeleteGood post! Thanks for sharing this amazing post
ReplyDeleteDevOps Training
DevOps Online Training
It's really Great Article.Thanks for sharing!
ReplyDeleteDevOps Training
DevOps Online Training
Great post I would like to thank you for the efforts you have made in writing this interesting and knowledgeable article. Emotion Code
ReplyDeleteWow, that is appealing studying. i am glad i found this and were given to artifice in it. great task upon this content. I preferred it loads. thanks for the colossal and precise data. Driver Genius Pro Crack
ReplyDeleteIt changed into wondering if I may want to use this write-taking area regarding my supplementary website, i can member it backing taking region in your website although.notable thanks. Super AntiSpyware Crack
ReplyDelete