Search

Drop Down MenusCSS Drop Down MenuPure CSS Dropdown Menu

Saturday, July 30, 2016

Getting Started – Xamarin.Forms


Introduction:
Xamarin.Forms is a cross platform UI toolkit that allow user to efficiently create native user interface layout. Code can be shared all the device (IOS,Android , Windows Phone and Win store app) .
System Requirement:
  1. Mac / Windows 7++ Machine with 8 GB RAM
  2. Xamarin  Studio 5.0 or new version/ Visual Studio 2012 or new version
Support Devices:
Xamarin.Forms applications can be support following operating systems devices
  • Android 4.0.3 (API 15) or higher
  • iOS 6.1 or higher
  • Windows Phone 8.1
  • Windows 8.1
  • Windows 10 Universal Apps
  • Windows Phone 8 Silverlight
                                 
How to create First Xamarin.Form Application?
Step 1:
Open Visual Studio ( Run Devenv.exe)
  • My system having following VS  version with xamarin

Step 2:
Create New Project ( File New Project )


Step 3:
Open New Project template Cross Platform Blank App(Xamarin .Forms .Portable)
*** Solution and project name is  DevXamarinForms

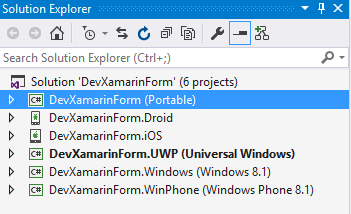
Visual Studio automatically creates following projects,
DevXamarinForms.Android, DevXamarinForms.iOS, DevXamarinForms.UWP, etc and a shared Portable Class Library (PCL) project named called DevXamarinForms (Refer below)
After create project solution should be like below
Step 4:
Right Click on Portable Project (DevXamarinForms) Add New Item Cross-Platform Forms Xaml Page and name it HomePage.CS
After that two new file are created under portable library HomePage.XAML and HomePage.XAML.cs
In  HomePage.XAMl , the below code will automatically added into xaml page
<?xml version="1.0" encoding="utf-8" ?>
<ContentPage xmlns="http://xamarin.com/schemas/2014/forms"
            xmlns:x="http://schemas.microsoft.com/winfx/2009/xaml"
            x:Class="DevXamarinForms.HomePage">
<Entry x:Name="txtresult" Text="welcome Devenvexe.com" />  <!--Add this TextBox-->
</ContentPage>

The xml two name space (xmls) are added into xaml page and refered xamarin and micrsoft url with version.
The HomePage.xaml.cs code-behind file looks like this.
using Xamarin.Forms;

namespace DevXamarinForms
{
   public partial class HomePage : ContentPage
   {
       public HomePage()
       {
           InitializeComponent();
       }
   }
}

Where Can find InitializeComponent() Method :
InitializeComponent() method will generate during build so build your portable library ,  C# code file is generated from the XAML file. If you look in the \DevXamarinForms\DevXamarinForms\obj\Debug directory, you’ll find a file named DevXamarinForms.HomePage.xaml.g.cs. The ‘g’ stands for generated.

namespace DevXamarinForm {
using System;
using Xamarin.Forms;
using Xamarin.Forms.Xaml;
public partial class HomePage : global::Xamarin.Forms.ContentPage {
[System.CodeDom.Compiler.GeneratedCodeAttribute("Xamarin.Forms.Build.
Tasks.XamlG", "0.0.0.0")]
private global::Xamarin.Forms.Entry txtresult;
[System.CodeDom.Compiler.GeneratedCodeAttribute("Xamarin.Forms.Build.
Tasks.XamlG", "0.0.0.0")]
       private void InitializeComponent() {
           this.LoadFromXaml(typeof(HomePage));
           txtresult = this.FindByName<global::Xamarin.Forms.Entry>("txtresult");
       }
   }
}

Just Modify App.CS file, like below
using System;
using System.Collections.Generic;
using System.Linq;
using System.Text;

using Xamarin.Forms;

namespace DevXamarinForm
{
   public class App : Application
   {
       public App()
       {
           // The root page of your application
           //MainPage = new ContentPage
           //{
           //    Content = new StackLayout
           //    {
           //        VerticalOptions = LayoutOptions.Center,
           //        Children = {
           //            new Label {
           //                HorizontalTextAlignment = TextAlignment.Center,
           //                Text = "Welcome to Xamarin Forms!"
           //            }
           //        }
           //    }
           //};
           MainPage = new HomePage(); // Add this code
       }

   }
}

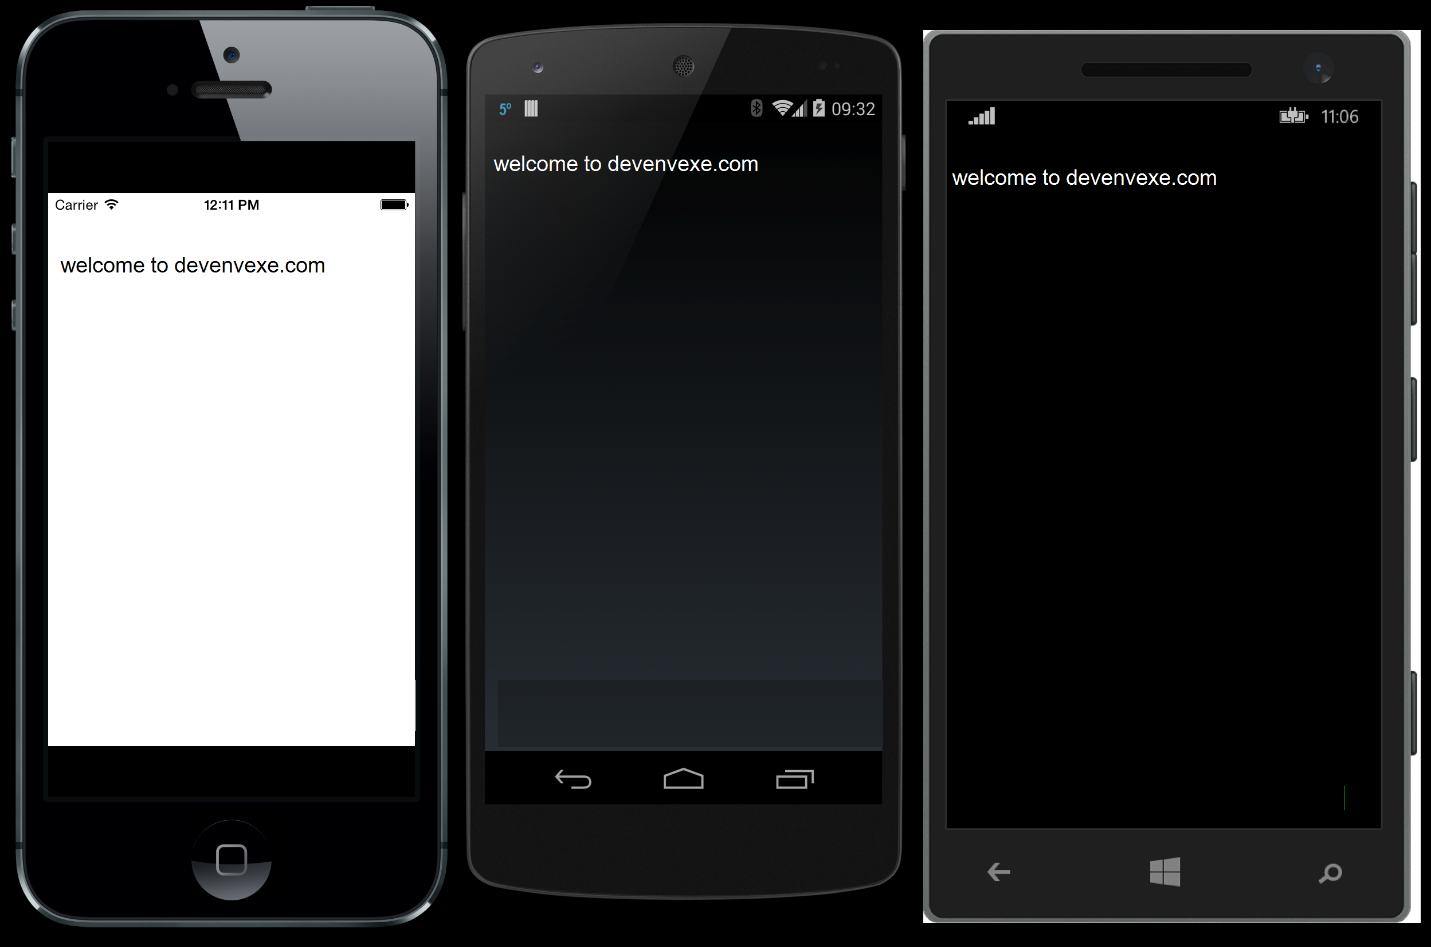
Build and Run Application:


Monday, July 18, 2016

Displaying List Data in Xamarin.Android and Visual Studio


Introduction

Let we look regarding list view binding. The cross-platform applications with Xamarin.iOS, Xamarin.Android the ListView control binding is structurally similar.

Xamarin.IOS
UITableViewSource 
Xamarin.Android
BaseAdapter

Your need follow Below steps for customizing a list view appearance


Step 1: Layout:

We need to create layout with List View controls.

HelloApp (ProjectName) è Resources  è layout (Right Click) è Add New Item è Select ( Android layout )  è Click Add

File Name: ListDemo.axaml  and drag drop List View control into layout page

<?xml version="1.0" encoding="utf-8"?>
<LinearLayout xmlns:android="http://schemas.android.com/apk/res/android"
    android:orientation="vertical"
    android:layout_width="match_parent"
    android:layout_height="match_parent"
    android:minWidth="25px"
    android:minHeight="25px">
    <ListView
        android:minWidth="25px"
        android:minHeight="25px"
        android:layout_width="match_parent"
        android:layout_height="match_parent"
        android:id="@+id/UserList" />
</LinearLayout>

****ListView Control name : UserList

Step 2: Model :

Create Model and add whatever property is required.

Model Name: User
Namespace :HelloApp.Model

namespace HelloApp.Model
{
    public class User
    {
     
        public string UName;
     
    }
}

Step 3: Adapter

Create adapter class and derived from BaseAdapter .
BaseAdapter is abstract class. we need implement following methods. We need select Row template and

namespace HelloApp.Adapters
{
    class UserAdapters : BaseAdapter<User>
    {
        List<User> userlist;
        Activity useractivity;
        public UserAdapters(Activity context ,List<User> item):base()
        {
            useractivity = context;
            userlist = item;
        }
        public override User this[int position]
        {
            get
            {
                throw new NotImplementedException();
            }
        }

        public override int Count
        {
            get
            {
                return userlist.Count;
            }
        }

        public override long GetItemId(int position)
        {
            return position;
        }

        public override View GetView(int position, View convertView, 
              ViewGroup parent)
        {
            var item = userlist[position];
            if(convertView == null)
            {
                convertView = useractivity.LayoutInflater.Inflate(Android.Resource.Layout.
SimpleExpandableListItem1,null);
              

            }
            convertView.FindViewById<TextView>(Android.Resource.Id.Text1).Text = item.uname;
            return convertView;

        }
    }
}

Step 4: Activity

HelloApp (ProjectName) (Right Click) è Add New Item è Select ( Activity)  è Click Add

Source Code :

namespace HelloApp
{
    [Activity(Label = "ListDemoActivity" , MainLauncher = true)]
    public class ListDemoActivity : Activity
    {
        private ListView UserListView;
        private List<User> userlist;
        protected override void OnCreate(Bundle savedInstanceState)
        {
            base.OnCreate(savedInstanceState);

            base.SetContentView(Resource.Layout.ListDemo);
            UserListView = FindViewById<ListView>(Resource.Id.UserList);
            userlist = new List<User>();
            userlist.Add(new User { UName = "Sutahahr" });

            userlist.Add(new User { UName = "Suresh" });
            userlist.Add(new User { UName = "Sumathi" });
            userlist.Add(new User { UName = "Sujatha" });
            UserListView.Adapter = new UserAdapters(this, userlist);


        }
    }
  
}

Source code explanation:

1.  [Activity(Label = "ListDemoActivity (Title Of Text)" , MainLauncher = true(Initial launcher))]

2.  private ListView UserListView – Find Control and assign to local variable

3.  private List<User> userlist;   - Assign Collection value

4.  base.SetContentView(Resource.Layout.ListDemo); - Assign layout content in activity

5.  UserListView = FindViewById<ListView>(Resource.Id.UserList); - Find user control from layout page

6.  userlist = new List<User>(); - add collection

7.  UserListView.Adapter = new UserAdapters(this, userlist); - Assign user collection into adapters