Introduction:
Google is considering the users privacy seriously, it has updated its Google Play Developer Policy which restricting SMS, CALL_LOG access. If your app does not require access to Call Log or SMS permissions, you must remove the permissions from your app's manifest.
For apps requesting access to the SMS or Call Log permissions, the intended and permitted uses include default SMS handling, default phone handling, or Assistant handling capability, you should only access Call Log or SMS permissions when your app falls within permitted uses and only to enable your app’s critical core functionality.
Android App Should read the SMS some specific needs like verify OTP, The Google Play Services has enabled Android SMS Retriever API allows you to access the SMS Messages and verify it via SMS without device permissions.
Verification Message Format:
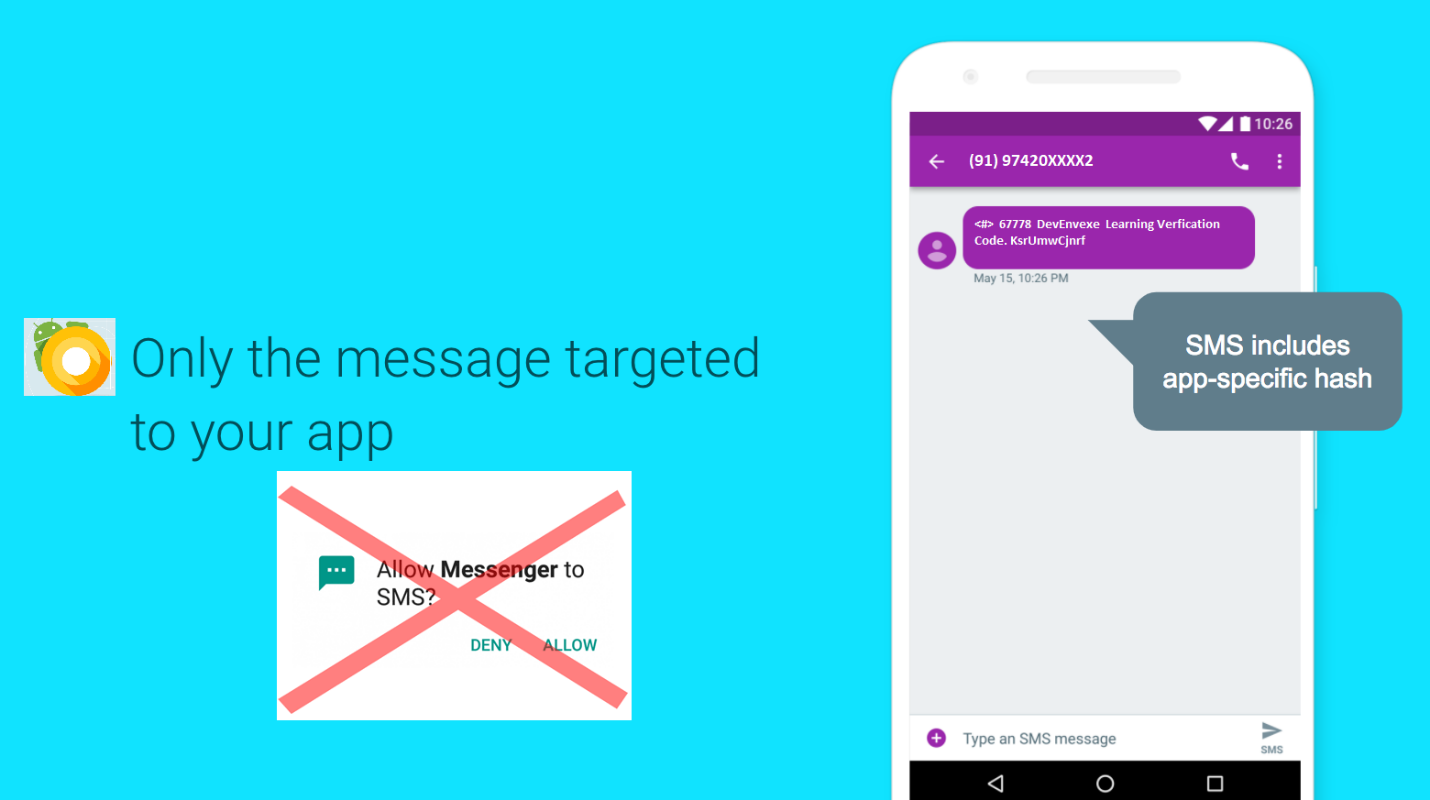
You need to follow as per Google Policy for construct the verification message and send to the user device, the message should be following format.
Be no longer than 140 bytes
Begin with the prefix <#>
One-time Verification code
Special 11-character hash for you app. That Hash can be generated by the Application. (will explain following steps)
Now we have very good understanding about Google new policy and message format. This article, I will explain the following steps, it will help you to integrate Android OTP verification code auto read using Xamarin Forms.
Create New Xamarin Forms Application.
Add Google Play Services Auth
Create UI Design
Dependency Service
Messaging Center subscribe
ListenToSms Dependency
Broadcast Receiver
Generate Application Hash Key Helper
Demo Application
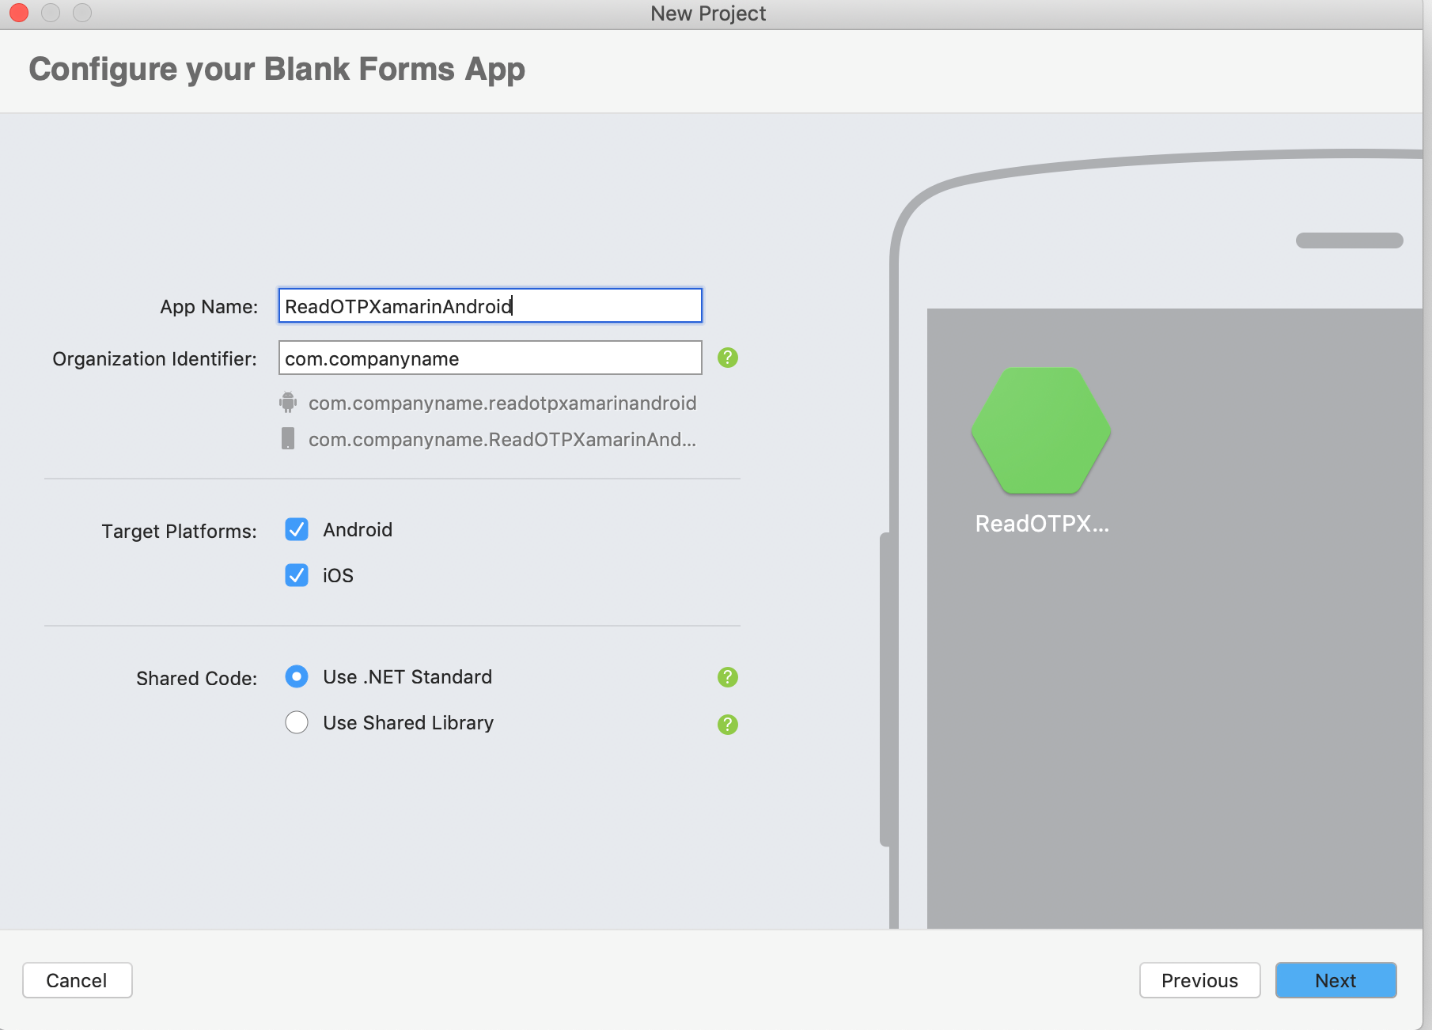
Create New Xamarin Forms Application
In order to implement Auto read OTP message, let’s start creating a new Xamarin.Forms project using Visual Studio 2019 or VS mac. When accessing Visual Studio 2019 mac for the first time, you will come across a new interface for opening a creating the projects.
Open Visual Studio Mac >>Create New Project or select open recent application.
The available templates will appear on a mac like below. Select Xamarin.Forms application with different mobile platforms.
Add Google Play Service NuGet Package:
After click on Next Button, The Xamairn Project template will generate and load the solutions into the local system. We need to install Xamarin.GooglePlayServices.Auth nuget package to our Android project for SMS Retriever API.
Right click on Android Project >> Add Nuget Package >> Select or Search “Xamarin.GooglePlayServices.Auth”>> Install the Latest version of Google play service.
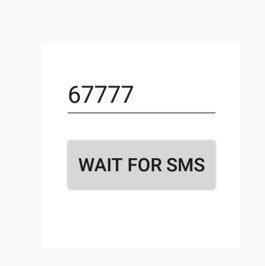
Create UI Design:
Create simple UI Design with one Entry and Button Control using Xaml in Xamarin Forms library.
<?xml version="1.0" encoding="utf-8"?>
<ContentPage xmlns="http://xamarin.com/schemas/2014/forms" xmlns:x="http://schemas.microsoft.com/winfx/2009/xaml" xmlns:local="clr-namespace:ReadOTPXamarinAndroid" x:Class="ReadOTPXamarinAndroid.MainPage">
<StackLayout Padding="15" HorizontalOptions="CenterAndExpand" VerticalOptions="CenterAndExpand" BackgroundColor="White">
<Entry PlaceholderColor="Black" Placeholder="Enter OTP" x:Name="smSEntry"></Entry>
<Button Text="Wait for sms" Clicked="ImageButton_OnClicked"></Button>
</StackLayout>
</ContentPage>
|
The Design Look like below
Dependency Service
DependencyService allows apps to call into platform-specific functionality from shared code. This functionality enables Xamarin.Forms apps to do anything that a native app can do. We need to create a interface design will define how you interact with platform-specific functionality. Here, reading OTP will support only android Platform and IOS will support with Autofill so create DependencyService interface for Listen to sms retriever. Create new class and interface for CommonServices.
using Xamarin.Forms;
namespace ReadOTPXamarinAndroid
{
public static class CommonServices
public static void ListenToSmsRetriever()
DependencyService.Get<IListenToSmsRetriever>()?.ListenToSmsRetriever();
public interface IListenToSmsRetriever
void ListenToSmsRetriever();
}
|
Messaging Center subscribe:
Xamarin.Forms MessagingCenter enables different components to communicate without having to know anything about each other besides a simple Message contract. The MessagingCenter is a static class with Subscribe and Send methods that are used throughout the solution.
Subscribe - Listen for messages with a certain signature and perform some action when they are received. Multiple subscribers can be listening for the same message.
Send - Publish a message for listeners to act upon. If no listeners have subscribed then the message is ignored.
Here, we are creating utility for subscribe message listener, it will help for if any new message recived the device notify to the solutions.
using System;
using System.Collections.Generic;
using System.Text;
using Xamarin.Forms;
namespace ReadOTPXamarinAndroid
{
public static class Utilities
private static readonly object cc = new object();
public static void Subscribe<TArgs>(this object subscriber, Events eventSubscribed, Action<TArgs> callBack)
MessagingCenter.Subscribe(subscriber, eventSubscribed.ToString(), new Action<object, TArgs>((e, a) => { callBack(a); }));
public static void Notify<TArgs>(Events eventNotified, TArgs argument)
MessagingCenter.Send(cc, eventNotified.ToString(), argument);
}
|
Create Enum for message Event type
using System;
namespace ReadOTPXamarinAndroid
{
public enum Events
SmsRecieved,
}
|
Code Behind Design View:
The Code Behind add the Subscribe message listener and if any message receive from message app with specific format, it will get notify and read the meesage and assign the OTP value into the Entry Box.
using System;
using System.Collections.Generic;
using System.ComponentModel;
using System.Linq;
using System.Text;
using System.Threading.Tasks;
using Xamarin.Forms;
using Xamarin.Forms.Xaml;
namespace ReadOTPXamarinAndroid
{
public partial class MainPage : ContentPage
public MainPage()
InitializeComponent();
this.Subscribe<string>(Events.SmsRecieved, code =>
smSEntry.Text = code;
});
private void ImageButton_OnClicked(object sender, EventArgs e)
CommonServices.ListenToSmsRetriever();
}
|
ListenToSms Dependency:
Let start create dependency to android project ,if you are not added Xamarin.GooglePlayServices.Auth NuGet package, try to add before going to create Instance.
Get an instance of SmsRetrieverClient, used to start listening for a matching SMS message.
SmsRetrieverClient client = SmsRetriever.GetClient(Application.Context);
|
Starts SmsRetriever, which waits for ONE matching SMS message until timeout (5 minutes). The matching SMS message will be sent via a Broadcast Intent .
var task = client.StartSmsRetriever();
|
Listen for success/failure of the start Task.
using Java.Lang;
using ReadOTPXamarinAndroid.Droid;
using Application = Android.App.Application;
[assembly: Dependency(typeof(ListenToSms))]
namespace ReadOTPXamarinAndroid.Droid
{
public class ListenToSms : IListenToSmsRetriever
public void ListenToSmsRetriever()
SmsRetrieverClient client = SmsRetriever.GetClient(Application.Context);
var task = client.StartSmsRetriever();
task.AddOnSuccessListener(new SuccessListener());
task.AddOnFailureListener(new FailureListener());
private class SuccessListener : Object, IOnSuccessListener
public void OnSuccess(Object result)
private class FailureListener : Object, IOnFailureListener
public void OnFailure(Exception e)
}
|
Broadcast Receiver:
The BroadcastReceiver that will be listening to the broadcasts of the above SmsRetreieverClient.SMS Retriever API has provided us with an intent filter SmsRetriever.SmsRetrievedAction which we will use to register our BroadcastReceiver, which we’re going name as SMSBroadcastReceiver, and implement as following.
using System.Linq;
using System.Text.RegularExpressions;
using Android.App;
using Android.Content;
using Android.Gms.Common.Apis;
using Com.Google.Android.Gms.Auth.Api.Phone;
using ReadOTPXamarinAndroid;
namespace ReadOTPXamarinAndroid.Droid
{
[BroadcastReceiver(Enabled = true, Exported = true)]
[IntentFilter(new[] { SmsRetriever.SmsRetrievedAction })]
public class SmsReceiver : BroadcastReceiver
private static readonly string[] OtpMessageBodyKeywordSet = { "DevEnvExe Generated OTP" }; //You must define your own Keywords
public override void OnReceive(Context context, Intent intent)
try
if (intent.Action != SmsRetriever.SmsRetrievedAction) return;
var bundle = intent.Extras;
if (bundle == null) return;
var status = (Statuses)bundle.Get(SmsRetriever.ExtraStatus);
switch (status.StatusCode)
case CommonStatusCodes.Success:
var message = (string)bundle.Get(SmsRetriever.ExtraSmsMessage);
var foundKeyword = OtpMessageBodyKeywordSet.Any(k => message.Contains(k));
if (!foundKeyword) return;
var code = ExtractNumber(message);
Utilities.Notify(Events.SmsRecieved, code);
break;
case CommonStatusCodes.Timeout:
break;
catch (System.Exception)
// ignored
private static string ExtractNumber(string text)
if (string.IsNullOrEmpty(text)) return "";
var number = Regex.Match(text, @"\d+").Value;
return number;
}
|
We have done code for now; it will go for testing. Before going to demo let we re consider the format of SMS, in that we need to get know about Application Hash key, Ley you follow below step for generate application hash key
Generate Application Hash Key Helper
The hash string is made of your app’s package name and your app’s public key certificate. To generate the hash code, just run the following C# Method to generate hash to be included in your SMS message.
You need to make sure you are generate hash key and append to the OTP message, Without the correct hash, your app won't receive the message callback.
Hash key will generate once per app and stored. Then you can remove this helper class from your code and create new class into the native android project.
using System;
using System.Linq;
using System.Text;
using Android.Content;
using Android.Content.PM;
using Android.Util;
using Java.Security;
using Java.Util;
namespace ReadOTPXamarinAndroid.Droid.Helper
{
public class AppHashKeyHelper
private static string HASH_TYPE = "SHA-256";
private static int NUM_HASHED_BYTES = 9;
private static int NUM_BASE64_CHAR = 11;
/// <summary>
/// Retrieve the app signed package signature
/// known as signed keystore file hex string
/// </summary>
/// <param name="context"></param>
/// <returns></returns>
private static string GetPackageSignature(Context context)
PackageManager packageManager = context.PackageManager;
var signatures = packageManager.GetPackageInfo(context.PackageName, PackageInfoFlags.Signatures).Signatures;
return signatures.First().ToCharsString();
/// <summary>
/// Gets the app hash key.
/// </summary>
/// <returns>The app hash key.</returns>
/// <param name="context">Android app Context.</param>
public static string GetAppHashKey(Context context)
string keystoreHexSignature = GetPackageSignature(context);
String appInfo = context.PackageName + " " + keystoreHexSignature;
try
MessageDigest messageDigest = MessageDigest.GetInstance(HASH_TYPE);
messageDigest.Update(Encoding.UTF8.GetBytes(appInfo));
byte[] hashSignature = messageDigest.Digest();
hashSignature = Arrays.CopyOfRange(hashSignature, 0, NUM_HASHED_BYTES);
String base64Hash = Android.Util.Base64.EncodeToString(hashSignature, Base64Flags.NoPadding | Base64Flags.NoWrap);
base64Hash = base64Hash.Substring(0, NUM_BASE64_CHAR);
return base64Hash;
catch (NoSuchAlgorithmException e)
return null;
}
|
You can call the GetAppHashkey method into MainActivity and debug the solution and get the hash key value.
Demo and Download Source Code:
The Application Ready now and you can also download the source code from Github , start the application using Android Emulator and click Phone icon from extended controls and add the message as per follow format with hash key.
Summary
In this article, you learned about Verify OTP Automatically in Android without SMS read permission using Xamarin Forms. I hope this article will help you. Please leave your feedback/query using the comments box, and if you like this article, please share it with your friends.