Introduction:
Secure channels are a cornerstone to users and employees working remotely and on the go. Users and developers expect end-to-end security when sending and receiving data - especially sensitive data on channels protected by VPN, SSL, or TLS. While organizations which control DNS, Host Entry and CA have likely reduced risk to trivial levels under most threat models, users and developers subjugated to other's DNS and a public CA hierarchy are exposed to non-trivial amounts of risk. In fact, history has shown those relying on outside services have suffered chronic breaches in their secure channels.
The Service-oriented applications with HTTPS (SSL/TLS), It enables developers to build secure, reliable, transacted, and interoperable distributed applications. The securing the communication between mobile app and services.
This article I am going to demonstrates how to consume an HTTPS service with self-signed certificate (certificate pinning using public key) from a Xamarin.Forms application.

Problem and issue:
Xamarin Mobile application easy to connect http://192.168.1.107 or http://devenevxe.com/xyz.json will work using HTTP client but while trying to connect ssl enabled URL and self-signed certificate, user will get many issue like below

There are many resolutions from the internet but you can follow below steps for pinning certificate using Xamairn Forms, this is exactly Apple and Android recommended way, let you try to follow the below steps for implement pinning certificate.
Create new Xamarin Forms Application:
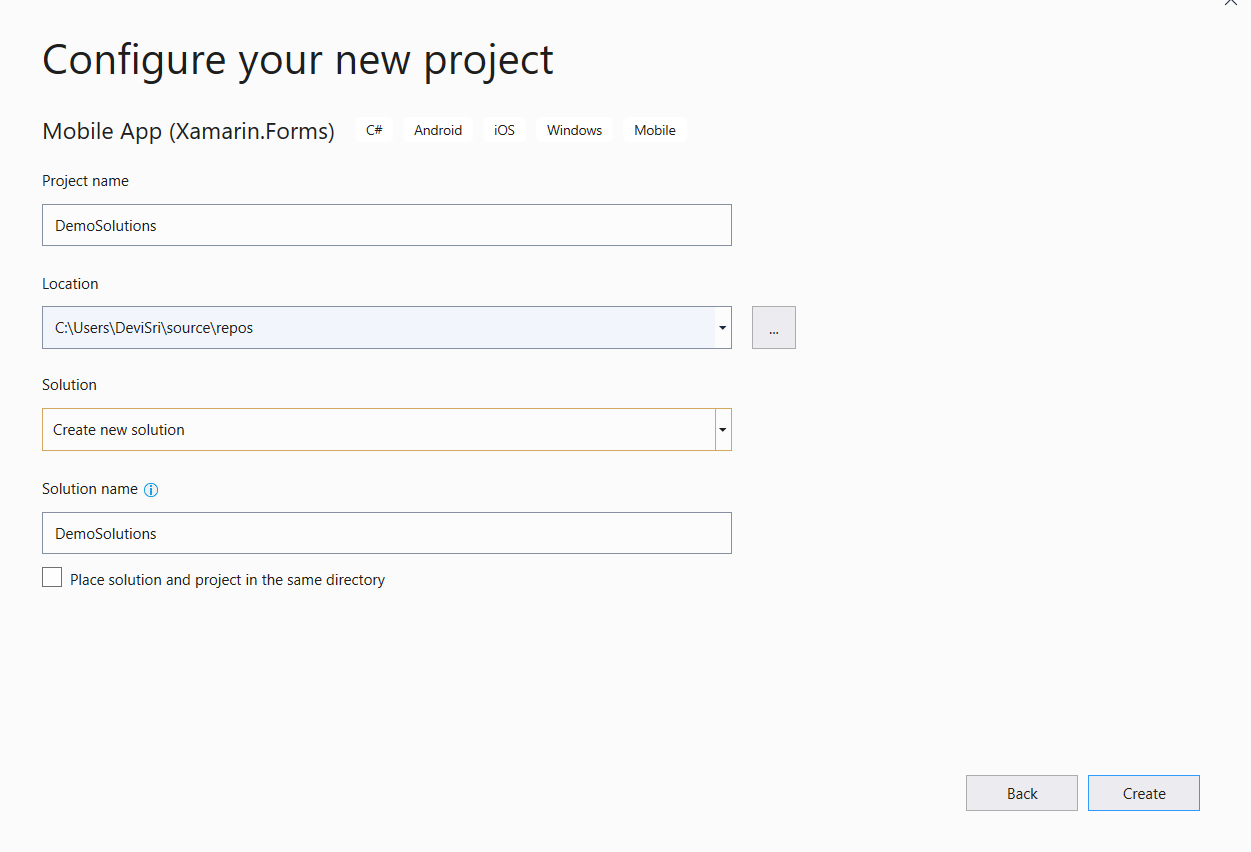
In order to implement certificate pinning, Let’s start creating a new Xamarin Forms Project using Visual Studio 2019 or VS mac. When accessing Visual Studio 2019 for the first time, you will come across a new interface for opening a creating the projects.
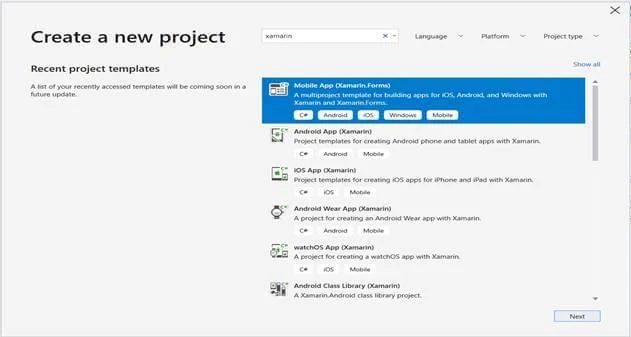
Open Run >> Type “Devenev.Exe” and enter >> Create New Project (Ctrl+Shift+N) or select open recent application.
The available templates will appear on a window like below. Select Xamarin Forms application with different mobile platforms.
Generate and Validation Public Key:
You will need the valid certificate’s public key. Public key developer can generate using GetPublicKeyString and validate the certificate using below two methods.
Create and add new C# httpsValidation class, include the following two namespaces with call back methods.
The System.Net.Security namespace provides network streams for secure communications between hosts. Provides methods for passing credentials across a stream and requesting or performing authentication for client-server applications.
The System.Security.Cryptography.X509Certificates namespace contains the common language runtime implementation of the Authenticode X.509 v.3 certificate. This certificate is signed with a private key that uniquely and positively identifies the holder of the certificate.
using System;
using System.Net;
using System.Net.Security;
using System.Security.Cryptography.X509Certificates; |
An application can set the ServerCertificateValidationCallback property to a method to use for custom validation by the client of the server certificate. When doing custom validation, the sender parameter passed to the RemoteCertificateValidationCallback can be a host string name or an object derived from WebRequest (HttpWebRequest, for example) depending on the CertificatePolicy property.
When custom validation is not used, the certificate name is compared with the host name used to create the request. For example, if Create (String) was passed a parameter of "https://www.devenvexe.com/default.html", the default behavior is for the client to check the certificate against www.devenvexe.com.
namespace HttpsService
{ public static class httpsValidation { //Call GenerateSSLpubklickey callback method and repalce here static string PUBLIC_KEY = "R E P L A C E - Y O U R P U B L I C K E Y "; public static void Initialize() { ServicePointManager.SecurityProtocol = SecurityProtocolType.Tls12; // ServicePointManager.ServerCertificateValidationCallback = OnValidateCertificate; //Generate Public Key and replace publickey variable // ServicePointManager.ServerCertificateValidationCallback = GenerateSSLPublicKey;
ServicePointManager.ServerCertificateValidationCallback = OnValidateCertificate;
} } } |
Despite being a multicast delegate, only the value returned from the last-executed event handler is considered authoritative. In other words, you can attach multiple delegates, and they all get a callback from ServerCertificateValidationCallback. Each callback returns a value that indicates whether the certificate is accepted or not; however, only the value from the last delegate is respected.
static bool OnValidateCertificate(object sender, X509Certificate certificate, X509Chain chain, SslPolicyErrors sslPolicyErrors)
{ var certPublicString = certificate?.GetPublicKeyString(); var keysMatch = PUBLIC_KEY == certPublicString; return keysMatch; } |
The following method uses the GetPublicKeyString method to return a certificate's public key as a string and add the same method to a callback for getting the public key.
static string GenerateSSLPublicKey(object sender, X509Certificate certificate, X509Chain chain, SslPolicyErrors sslPolicyErrors)
{ string certPublicString = certificate?.GetPublicKeyString(); return certPublicString ; } |
Create Service Helper Class:
Create or add service helper c# class and replace your base URL and relative URL .if you are using any local on premises with a self-signed certificate with a host entry, try to add the URL like below, if you are getting any issue in the Android application . You can replace with IP address instead of the domain address.
public class ServiceHelper
{ //if you are using local Hosting or on premises with self signed certficate, //in IOS add domain host address and Android use IP ADDRESS const string SERVICE_BASE_URL = "https://devenvexe.com"; //replace base address const string SERVICE_RELATIVE_URL = "/my/api/path"; |
Represents the file compression and decompression encoding format to be used to compress the data received in response to an HttpWebRequest.
private async Task<string> GetDataAsync(string baseUrl, string relUrl)
{ var uri = new Uri(relUrl, UriKind.Relative); var request = new HttpRequestMessage { Method = HttpMethod.Get, RequestUri = uri }; var client = GetHttpClient(baseUrl); HttpResponseMessage response = null; try { response = await client.GetAsync(request.RequestUri, HttpCompletionOption.ResponseHeadersRead); } catch (Exception ex) { return ex.InnerException.Message; } var content = await response.Content.ReadAsStringAsync(); return content; } HttpClient GetHttpClient(string baseUrl) { var handler = new HttpClientHandler { UseProxy = true, AutomaticDecompression = DecompressionMethods.GZip | DecompressionMethods.Deflate }; var client = new HttpClient(handler) { BaseAddress = new Uri(baseUrl) }; client.DefaultRequestHeaders.Connection.Add("keep-alive"); client.DefaultRequestHeaders.AcceptEncoding.Add(new StringWithQualityHeaderValue("gzip")); client.DefaultRequestHeaders.AcceptEncoding.Add(new StringWithQualityHeaderValue("deflate")); return client; } |
Initialize SSL Validation:
Initialize SSL static validation from App.Xaml.cs, it’s common for iOS and Android platform.
using System;
using Xamarin.Forms; using Xamarin.Forms.Xaml; namespace HttpsService { public partial class App : Application { public App() { InitializeComponent(); httpsValidation.Initialize(); MainPage = new MainPage(); } } } |
Create View Model:
Create View model class for calling the service helper class and bind to the UI Screen
using System;
using System.Threading.Tasks; using System.Windows.Input; using Xamarin.Forms; namespace HttpsService { public class ServiceViewModel : BaseViewModel { string _data; public string Data { get { return _data; } set { base.SetProperty<string>(ref _data, value, "Data", null); } } // public ICommand Refersh { private set; get; } ServiceHelper _dataService; public ServiceViewModel() { _dataService = new ServiceHelper();
GetAsync();
} public async Task GetAsync() { Data = "Loading..."; // Artificial delay await Task.Delay(1000); Data = await _dataService.GetDataAsync(); } } } |
Create UI Design:
Start create simple UI Design for display service data.
<?xml version="1.0" encoding="utf-8"?>
<ContentPage xmlns="http://xamarin.com/schemas/2014/forms" xmlns:x="http://schemas.microsoft.com/winfx/2009/xaml" xmlns:local="clr-namespace:HttpsService" x:Class="HttpsService.MainPage"> <ContentPage.BindingContext> <local:ServiceViewModel/> </ContentPage.BindingContext> <StackLayout VerticalOptions="Center" HorizontalOptions="Center" Margin="64"> <Label Text="Consume SSL Service" HorizontalTextAlignment="Center" TextColor="Green" /> <Label Text="{Binding Data}" HorizontalTextAlignment="Center" /> </StackLayout> </ContentPage> |
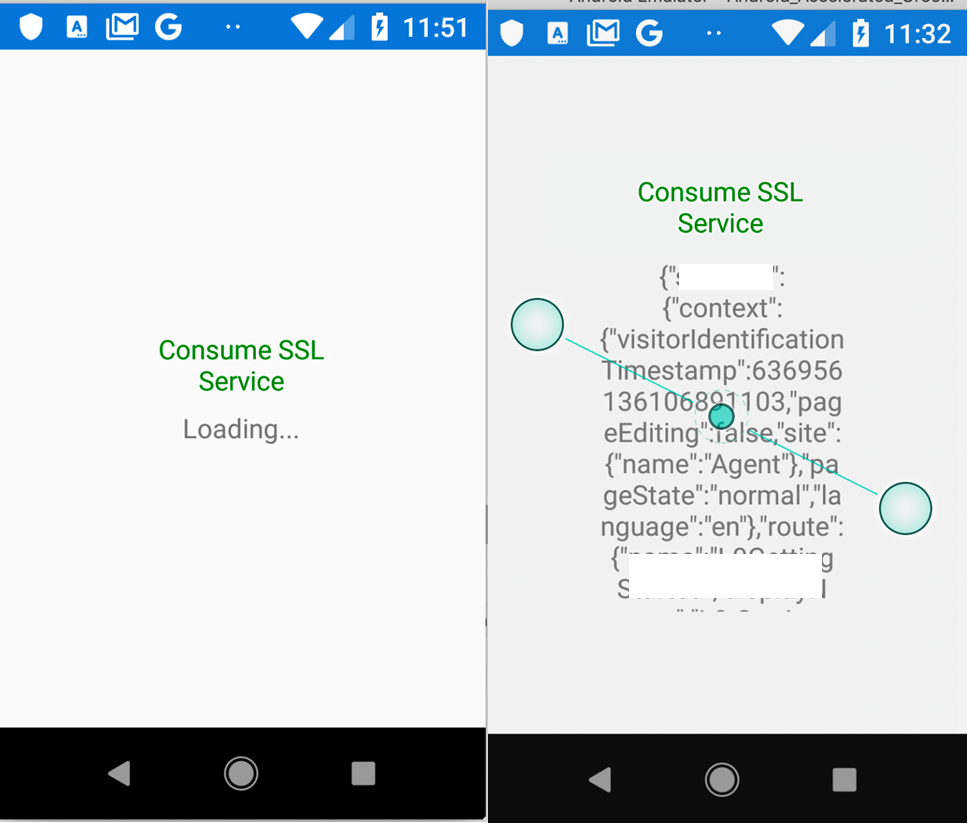
I hope you followed above steps and created a sample application, now you start to run the application android, IOS, and UWP application, the output looks like below .if you are looking sample application download source from GitHub.
Summary:
I hope you resolved your SSL service consume issue, if you are getting any other issue while consuming data, please share in the comment box.