
Introduction:
We all knew xamarin and visual studio is great technology. You are no longer restrict develop only phone and tablet now you can develop Android wearable apps using xamarin. Android wear was officially released by google on 2014.
In this article, I will show how to setup and create Android Wearable App using xamarin ,
System Requirements
- Mac / Windows 7++ Machine with 8 GB RAM.
- Xamarin Studio 5.0 or new version/ Visual Studio 2012 or new version.
- Visual Studio required professional or higher version because the Xamarin extension for Visual Studio will only be supported for non-express editions. Download Visual studio from here( https://www.xamarin.com/visual-studio)
Install Android SDK & Tools:
You can start open visual studio in Windows machine. Open Visual Studio (Run => type “Devenev.exe”)

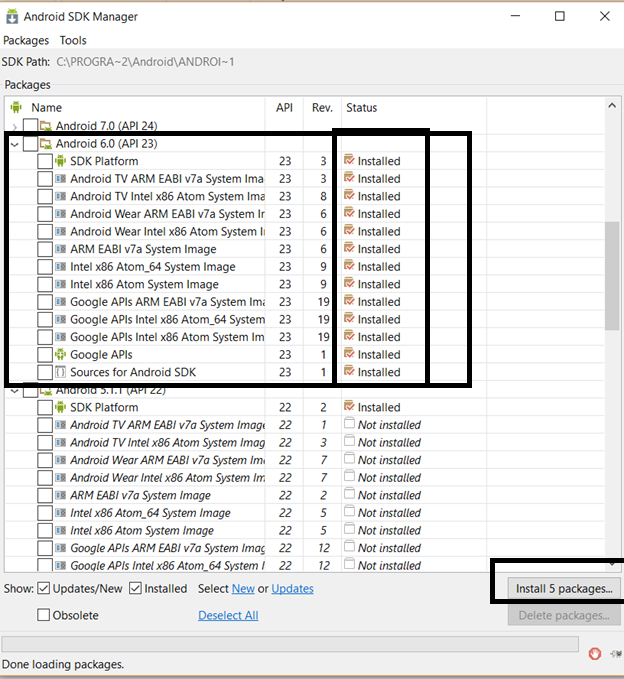
You can verify all required SDK was installed in Visual Studio. If you do not have the latest SDK and tools installed, download the required SDK tools and the API. Go to Tools menu =>Android =>Android SDK manager. Android SDK manager window will visible in your system like below
Create Android Wear emulator
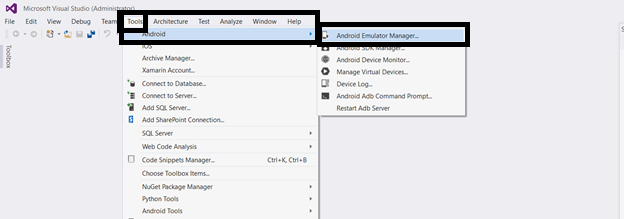
In order for us to run the android wear application we need to first setup an emulator. You can create one by following these few steps. Go to Tools in Visual Studio > Andriod > Andriod Emulator Manager. See below
Following screen, you will get know already created emulator. if you want to create new emulator click on “Create “button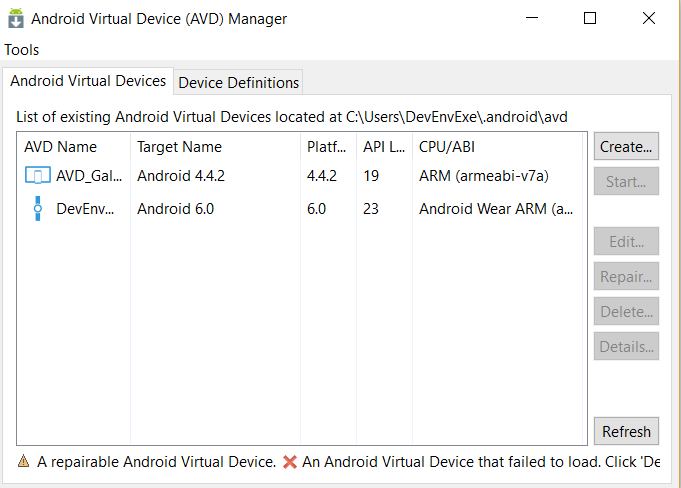
After click on create button and provide following information AVD name, Device Name, chose correct Target platform and click on Create.
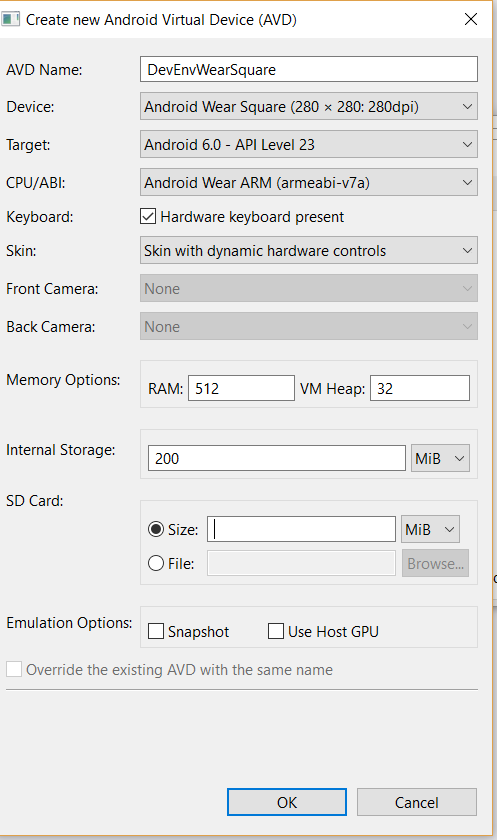
If you get any error "No CPU /ABI system image available for this target” means target SDK not installed. you can chose different target or install specific target SDK. when creating the device, make sure that the correct target of the OS is selected, but especially that the CPU is Android Wear ARM. after creating emulator you will receive following message for confirmation
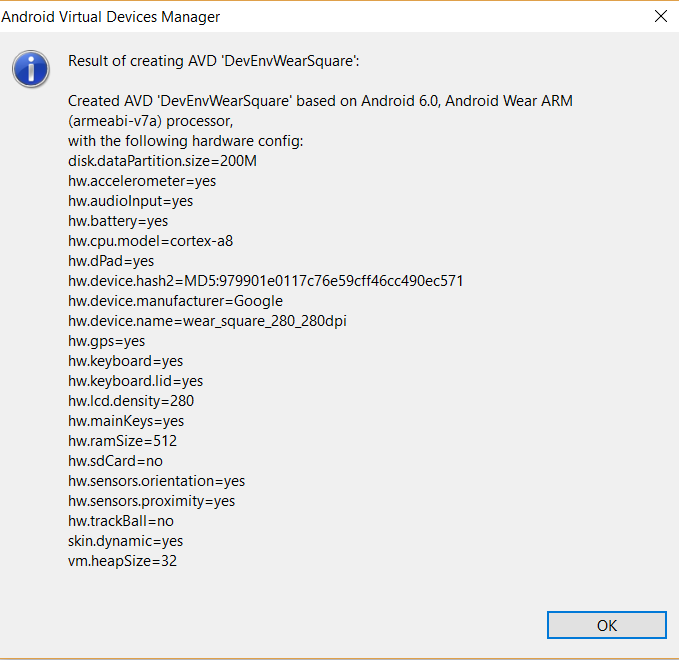
After click on Okay you will get following screen for list of emulator

Create New Project:
You can follow below steps for Create your first Android Wear app and run it on a Wear emulator . File => New => Project. you can select project as Android and select template is Wear App. Now automatically project and wear reference will added .

See below screen for project structure and reference

In the Solution ,included xamarin android wearable reference and icon for tile image ,3 layout for rectangle and round watch and phone layout with common MainActivity class
Round / Rectangle Main.axml:
I have included sample reference axaml code .you can modify as per your requirement
<?xml version="1.0" encoding="utf-8"?>
<LinearLayout xmlns:android="http://schemas.android.com/apk/res/android"
xmlns:tools="http://schemas.android.com/tools"
android:orientation="vertical"
android:layout_width="match_parent"
android:layout_height="match_parent"
tools:context=".MainActivity"
tools:deviceIds="wear_round">
<Button
android:id="@+id/msdnbutton"
android:layout_width="match_parent"
android:layout_height="wrap_content"
android:text="@string/msdn" />
<Button
android:id="@+id/csharpbutton"
android:layout_width="match_parent"
android:layout_height="wrap_content"
android:text="@string/csharp" />
<Button
android:id="@+id/bloggerbutton"
android:layout_width="match_parent"
android:layout_height="wrap_content"
android:text="@string/blogger" />
</LinearLayout>
|
MainActivity.CS
In MainActivity Class, create onbutton click and show the notification
using System;
using Android.App;
using Android.Content;
using Android.Runtime;
using Android.Views;
using Android.Widget;
using Android.OS;
using Android.Support.Wearable.Views;
using Android.Support.V4.App;
using Android.Support.V4.View;
using Java.Interop;
using Android.Views.Animations;
namespace DevEnvWear
{
[Activity(Label = "DevEnvWear", MainLauncher = true, Icon = "@drawable/icon")]
public class MainActivity : Activity
{
int count = 1;
protected override void OnCreate(Bundle bundle)
{
base.OnCreate(bundle);
// Set our view from the "main" layout resource
SetContentView(Resource.Layout.Main);
var v = FindViewById<WatchViewStub>(Resource.Id.watch_view_stub);
v.LayoutInflated += delegate
{
// Get our button from the layout resource,
// and attach an event to it
Button buttonmsdn = FindViewById<Button>(Resource.Id.msdnbutton);
Button buttoncsharp = FindViewById<Button>(Resource.Id.csharpbutton);
Button buttonblog = FindViewById<Button>(Resource.Id.bloggerbutton);
buttonmsdn.Click += delegate
{
var notification = new NotificationCompat.Builder(this)
.SetContentTitle("MSDN")
.SetContentText("https://social.msdn.microsoft.com/profile/j%20suthahar/")
.SetSmallIcon(Android.Resource.Drawable.StatNotifyVoicemail)
.SetGroup("group_key_demo").Build();
var manager = NotificationManagerCompat.From(this);
manager.Notify(1, notification);
};
buttoncsharp.Click += delegate
{
var notification = new NotificationCompat.Builder(this)
.SetContentTitle("C# Corner")
.SetContentText("http://www.c-sharpcorner.com/members/suthahar-j")
.SetSmallIcon(Android.Resource.Drawable.StatNotifyVoicemail)
.SetGroup("group_key_demo").Build();
var manager = NotificationManagerCompat.From(this);
manager.Notify(1, notification);
};
buttonblog.Click += delegate
{
var notification = new NotificationCompat.Builder(this)
.SetContentTitle("My Blog")
.SetContentText("www.devenvexe.com")
.SetSmallIcon(Android.Resource.Drawable.StatNotifyVoicemail)
.SetGroup("group_key_demo").Build();
var manager = NotificationManagerCompat.From(this);
manager.Notify(1, notification);
};
};
}
}
}
|
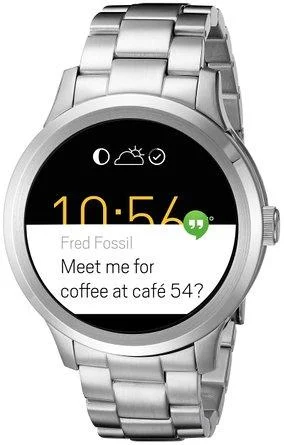
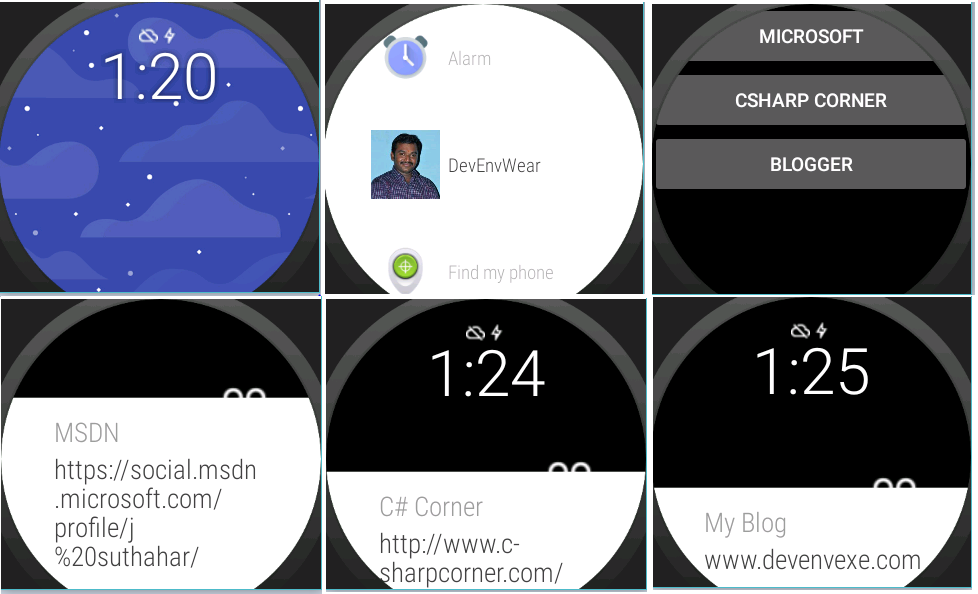
Output Screen:
You can refer below screen for output. Click on tile => click on any button => swipe to home and see the notification
Thanks for sharing this blog!!!
ReplyDeleteOnline Ordering and Delivery Software Application for Restaurant Business
It was great to read your blog.
ReplyDeletebot for website