Storyboards feature first introduced in iOS 5 that save time building user interfaces for iOS mobile apps. Storyboards allow you to prototype and design multiple view controller views within one file. A typical remark is that storyboards are great for small projects, but fall short for larger projects.
Source code is another hurdle when working with storyboards is collaboration. A storyboard is stored as one file. This means that every change you and a team member make to a storyboard affects the same file. At some point, this will inevitably lead to merge conflicts. We don’t have any problem, when using XIB files since each XIB file represents one scene of the user interface.
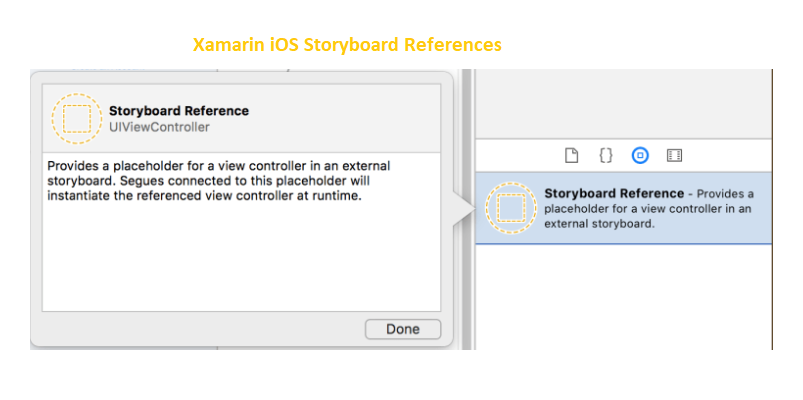
Apple introduced storyboard references in iOS 9 and macOS 10.11 with the goal of making storyboards less daunting and easier to manage. Storyboard references allow you to break a storyboard up into multiple, smaller storyboards.
Create New Xamarin. iOS Application
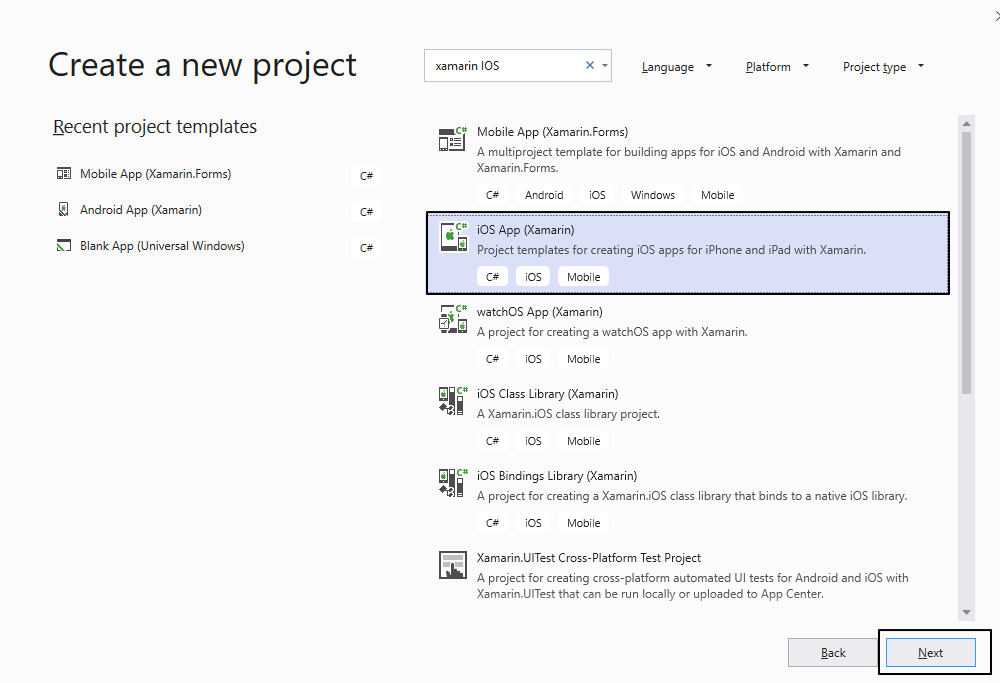
In order to learn the storyboard, let’s start creating a new Xamarin. iOS project using Visual Studio 2019 or VS for Mac. When using Visual Studio 2019 on Windows machine , you will need to pair the mac machine.
Open Visual Studio 2019 >>Create New Project or select "Open Recent Application" and the available templates will appear on a Windows like below. Select Xamarin. iOS app and click on “Next”
Create a Empty iPhone/iPad Single View Storyboard Application

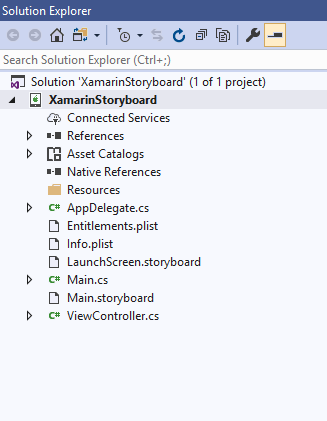
The content of a storyboard is stored as an XML file. Storyboard files are compiled into binary files known as nibs. At runtime, these nibs are initialized and instantiated to create new views. After selection of single view application, solutions template will generate as below
Main StoryBoard:
Open Main. storyboard where you can find single view controller . Add one more view controller and update the view controllers as shown below.

View Controller Segue:
Let us now connect both the view controllers. Segue is used in iOS development to represent a transition between scenes. To create a segue, hold down the Ctrl key and click-drag from one scene to another. As we drag our mouse, a blue connector appears and select as Show/ Push as image below

Referencing Storyboard:
Let we continue to add a reference to an external Storyboard, follow the below steps
In the Solution Explorer, right-click on our Project Name and select Add > New File... > iOS > Storyboard. Enter a Name for the new Storyboard and click the Add button

Design the layout of the new Storyboard's scenes

Add Storyboard Reference:
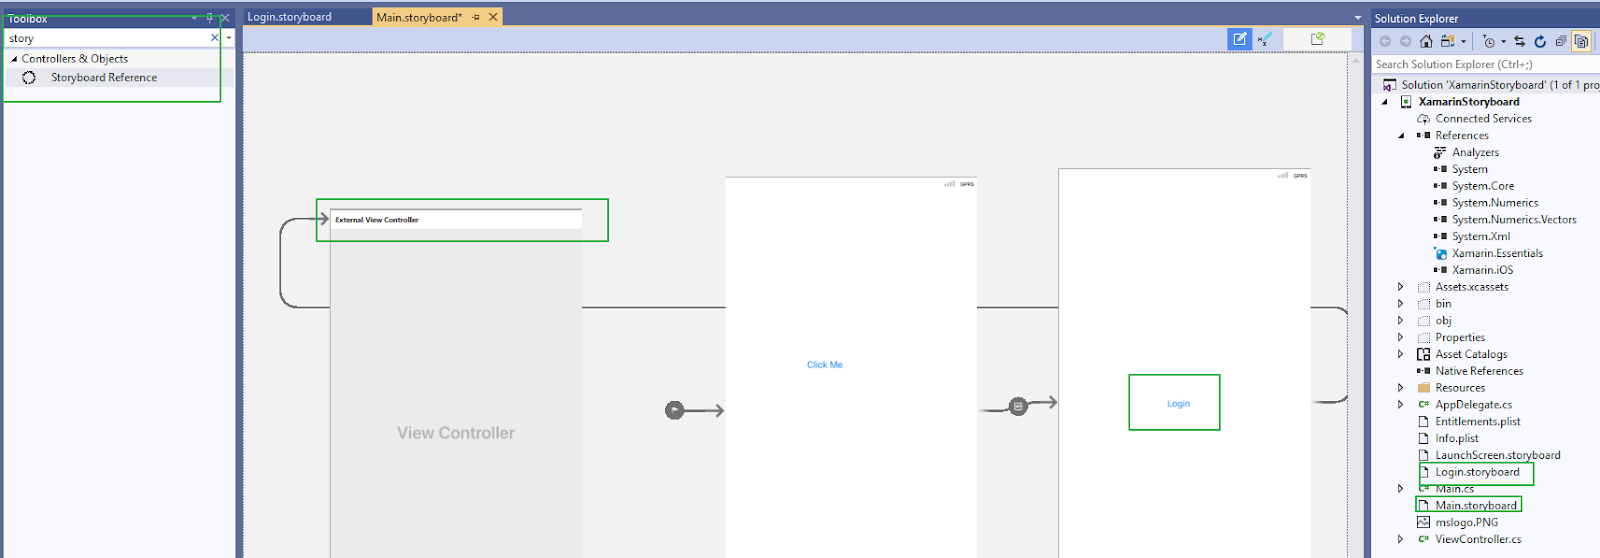
Step 1: Open the Main Storyboard that you are going to be adding the reference to in the iOS Designer. Drag a Storyboard Reference from the Toolbox onto the Design Surface.
Step 2: In the Widget tab of the Properties Explorer, Enter the name (Login) of the Storyboard that you created above.
Step 3: Control-click on a Button on an existing Scene and create a new Segue to the Storyboard Reference.
Step 4: The popup menu selects Show to complete the Segue, Save the changes and Click on Run Options
Output:
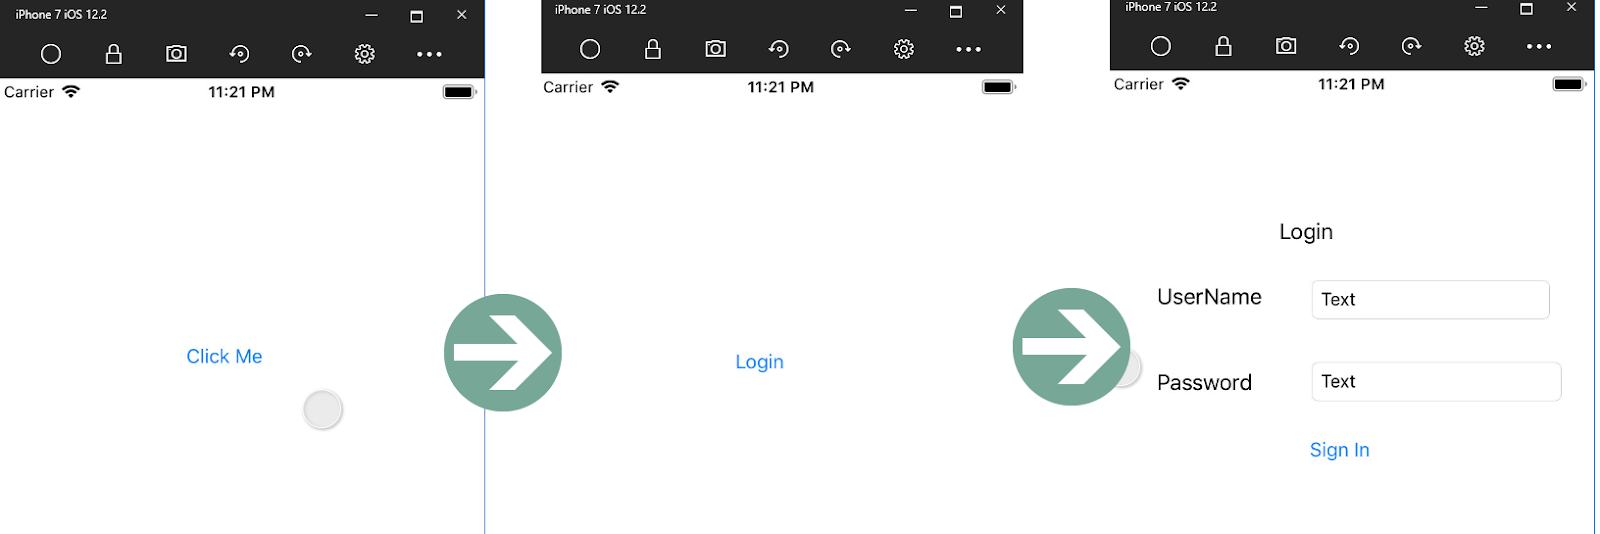
When you run the application in an iPhone device, you will get the following output and click on button , it will navigate to new reference screen .
Summary:
This article has demonstrated how to create and referencing an External Xamarin iOS Storyboard using Visual Studio. I hope this article will help you. Please leave your feedback/query using the comments box, and if you like this article, please share it with your friends.
No comments:
Post a Comment